BM #116 Day 11 - 

I start this week and shall post mini thalis featuring a new flatbread each day.

Today's flatbread is a Vegan Kheema Paratha. The filling is made out of soy granules. With spices and onions, the filling is delicious by itself. Filling it in a paratha is definitely a step up in flavor.

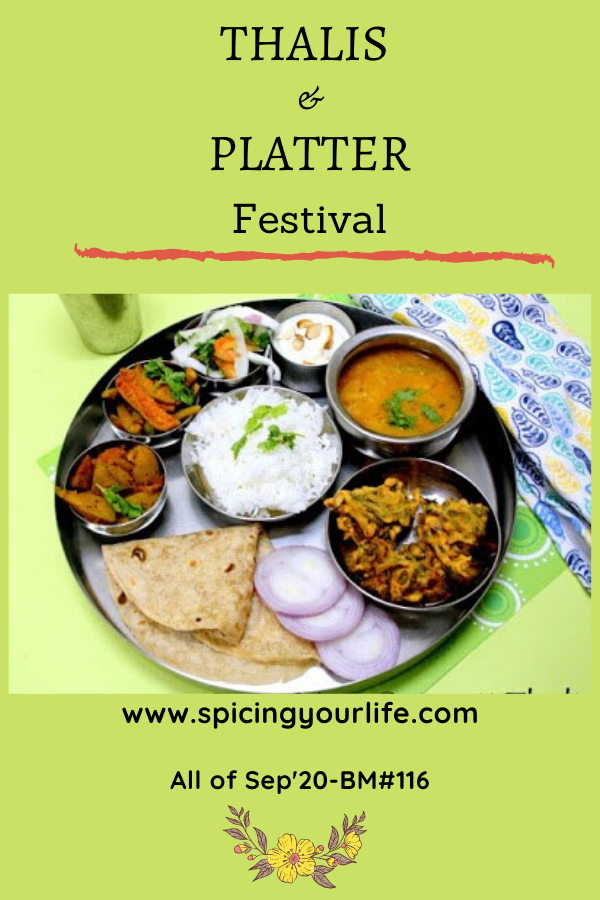
Featured in this Flatbread Thali are - Rice, Veg Pulao, Chikkudukaya koora, Methi Dal, Mamidikaya Menthibaddalu, Yogurt, Vegan Kheema Paratha, Shakkarpare and Brownies.

Here is a recap for the past 2 weeks..

Week 1 - Platters
Week 2 - Simple Everyday Mini Thalis

Everyday Mini Thali 5 - Radish Peas Rice - Day 9

Recipe Source here
Ingredients - 

Wheat Flour 1 1/2 cups
Salt as needed
Water to knead the dough
For the Filling - 
Oil 1 tsp
Soy Granules (TVP) 3/4 cup
Onions, finely chopped 2 Tbsp
Ginger-Garlic paste 1 tsp
Salt, Turmeric, Red Chili Powder, Garam Masala as needed
Coriander Powder 1/2 tsp
Cumin Powder 1/2 tsp
Ajwain coarsely crushed


Method Of Preparation -


Prepare the filling - 
Boil about 2 cups of water and add the soy granules. Remove from heat and allow the granules to soften. After about 10 minutes, drain all the water by squeezing the granules and set aside.

In a heated pan, add oil and ginger-garlic paste. Add onions and saute until golden brown. Add the soy granules and stir well for about 2-3 minutes and allow the granules to cook well.

Sprinkle salt, turmeric, red chili powder, garam masala, coriander powder, cumin powder and coarsely crushed ajwain. Mix well and allow the flavors to blend in.

Cover and remove from heat. Allow it to cool.

To make the Parathas - 
Knead the chapati dough with the whole wheat flour and salt with as much water as needed. Keep it covered for about 10-15 min.


Make 6 equal portions of the dough. 

Roll out each of the portion into small chapatis, fill in a tablespoon of the soy granule mixture, close the edges and roll out the parathas taking care that the mixture doesn't fall out. 

Shallow fry on a griddle/tawa until both the sides are done spraying as much oil as needed. Repeat the procedure for all the parathas.


Enjoy with Yogurt and/or any pickle.


You are invited to the Inlinkz link party!
Click here to enter


Preparation Time 30 minutes
Makes 6

Read More
Posted by Harini R on Sunday, September 13, 2020


BM #116 Day 10 - 

Today is the 6th thali in the category of Simple everyday thalis. This is a very special thali as I have used our freshly harvested raw tomatoes to make Raw Tomato Chutney, Raw Tomato Curry With Moong, and Raw Tomato Dal. Also in the picture are Rice, Yogurt, Mango Fruit Salad, and Uppu Mirapakai (Mor Milagai).

This Mango Fruit Salad is a perfect recipe for a make ahead dessert for a party. Thanks to Sandhya for helping me with the recipe and giving me tips which helped me rest easy.

The measurement for each of the ingredients given in the recipe is just a rough guideline. Feel free to play around the quantities of each of them. It is a simple, no-nonsense recipe. I have since referred this dessert to so many of my friends and family.

We will take a break for Saturday and come back on Sunday with yet another theme for week 3.

Before we go on to the easy peasy recipe, here is a recap of all the posts in week 1 and 2.

Week 1 - Platters

Week 2 - Simple Everyday Mini Thalis


Recipe Source Sandhya
Ingredients - 

Mixed Fruits 3-4 cups (I used apple, banana and grapes)
Mango Pulp about 2 cups (I used the unsweetened Mango Pulp)
Condensed Milk about 1/2 cup
Whipped Cream about a cup

Note - Freel free to adjust the ingredients as per taste. There is no rule for the proportions.


Method Of Preparation -

In a large mixing bowl, whisk together gently the mango pulp, condensed milk and whipped cream until they are combined well and they appear creamy.

Wash and chop all the fruits into bite size pieces.

Toss in the fruits and mix gently. We like to have more fruits with a light coating of the creamy mixture. So adjust accordingly.

Cover and refrigerate for a few hours before serving. It stays good for upto 3-4 days when stored properly in the refrigerator.


You are invited to the Inlinkz link party!
Click here to enter


Preparation Time 15 minutes ; Resting time 1 hour +
Serves 10-15 approximately

Read More
Posted by Harini R on Friday, September 11, 2020


BM #116 Day 9 - 

Here I am showcasing another basic No Onion No Garlic meal option with a Tomato Dal, Aloo Fry and a rice dish which is very uncommon.

Personally, I am not a fan of radish. But when my cousin urged me to try this out, I thought to myself that if I don't like it then my husband who is a radish lover can help in finishing off the rice :).

But to my surprise there was no lingering taste of radish in the final product. This was loved by the whole family thanks to my cousin.

Recipe Source Mallika
Ingredients - 

Rice 1 1/2 cups
Radish, peeled and grated 2 cups
Peas 1/2 cup (I used frozen peas)
Roasted Peanut Powder 1/4 cup
Turmeric and Salt as needed
Lemon Juice 3-4 tsp or as needed
Seasoning (Oil 1 Tbsp, Mustard Seeds 1/2 tsp, Chana Dal 2 tsp, Urad Dal 1 tsp, Cumin seeds 1/2 tsp, Peanuts 1/4 cup, Curry leaves few)
To Grind - 
Mint leaves handful
Coriander leaves handful
Green Chilies 4-5 (or as needed)
Ginger 1 inch piece


Method Of Preparation -


Cook rice separately in any method as preferred. I cooked it in the Instant Pot.

Grind the mint, coriander leaves, ginger and green chilies into a fine paste adding as little water as needed.

In a bowl, add the grated radish and mix in the coriander-mint paste. Let the radish marinate in the mixture while the rest of the process is taken care of.

Spread the cooked rice in a wide platter allowing it to cool.

Roast peanuts and coarsely crush them. Set it aside.

Prepare the seasoning by heating a pan. Add the ingredients of the seasoning and allow them to be toasted well. Pour the seasoning onto the rice which is spread out on the platter.

In the same heated pan, add a teaspoon of oil if needed and saute the marinated radish. Also thaw the frozen peas and add them in.

Ensure the radish is cooked through. Sprinkle salt and turmeric and reduce the heat.

Add in the rice and gently mix.

Remove from heat, squeeze the lemon juice and mix well.

Cover and allow the rice to absorb all the flavors.

Serve it warm as part of a meal.


You are invited to the Inlinkz link party!
Click here to enter


Preparation Time 30 minutes
Serves 5-6

Read More
Posted by Harini R on Thursday, September 10, 2020


BM #116 Day 8 - 

Today's simple thali is unlike the remaining thalis I have posted. We are not 100% rice eaters. We enjoy our share of rotis, parathas, phulkas, theplas etc as well.

Recently I had a conversation with a friend about how we never had paneer in our growing up years. Milk and milk products were consumed in moderation and I think amma used to make some dessert if the milk accidentally curdled. But never do I remember amma making some sort of sabji with paneer. 

It just makes me wonder how much our food habits have changed and I am sure the next generation will think on the same lines.

Today's no rice thali has Paneer Bhurji and Aloo Gobi along with Phulka and Yogurt. I would have loved to have some salad and pickle in the frame.

Ingredients - 

Onions finely chopped 1/2 cup
Bell Peppers Green, Red, and/or Orange finely chopped 1/4 cup
Tomato, coarsely crushed 1/2 cup
Ginger-Garlic-Green Chili Paste 2 tsp (or to taste)
Paneer Grated 2 cups
Salt, Turmeric as needed
Dhania Powder 1 tsp
Cumin Powder 1/2 tsp
Garam Masala 1/4 tsp
Kasuri Methi 1 tsp
Seasoning (Oil 1 Tbsp, Cumin seeds 1 tsp)


Method Of Preparation -


In a heated pan, add oil and cumin seeds. After they crackle, add in the ginger-garlic-green chili paste. Saute for a few seconds.

Add the onions and saute until they are translucent. Add in the finely chopped peppers and crushed tomato and allow them to cook for a few minutes.

Sprinkle turmeric, salt, dhania powder, cumin powder, garam masala and sprinkle a few spoons of water if the mixture appears too dry.

Mix well and add the grated paneer. Toss gently sprinkling some kasuri methi.

Cover and remove from heat. The steam will do the rest of the job. Serve after 5 minutes with roti.


 Check out the Blogging Marathon page for the other Blogging Marathoners doing BM#116
You are invited to the Inlinkz link party!
Click here to enter


Preparation Time 20 minutes
Serves 6-7

Read More
Posted by Harini R on Wednesday, September 9, 2020


BM #116 Day 7 - 

Today's thali is an assembled one with no pattern. My husband and I love pongal of all varieties but the kids have different taste buds. I made this meal when schools were in session (so long ago) and so pongal - palakura pulusu were basically my lunch.

I made Aloo Muddha Koora for the kids to have an option for their next meal. 

Featured here are Little Millet Pongal, Rice, Palakura Pulusu, Raw Plum Chutney, Aloo Muddha Koora and yogurt.


Ingredients - 

Raw Plum pitted and finely chopped - 1 1/2 cups
Mirchi powder 1 tsp (or as per taste)
Mustard powder 1 tsp (or as per taste)
Salt 1 tsp  (or as per taste)
Fenugreek powder (roasted methi powder) 1/8 tsp  (or as per taste)
Turmeric 1/2 tsp
Oil 1 Tbsp
Asafotida (Hing) 1/8 tsp


Method Of Preparation -


Wash and dry the Raw Plums. Remove the center seed and chop each of the plums into small pieces.

Add salt and turmeric and mix it well. Leave it aside for a few minutes.

Add mustard powder, mirchi powder, methi powder, oil and asafoetida and mix well.


Serve this pickle after an hour or so with steaming hot rice and ghee for a satisfying meal.


 Check out the Blogging Marathon page for the other Blogging Marathoners doing BM#116
You are invited to the Inlinkz link party!
Click here to enter


Preparation Time 15 minutes
Makes 1 1/2 cups

Read More
Posted by Harini R on Tuesday, September 8, 2020


BM #116 Day 6 - 

Here is an everyday thali with a different set of dishes. 

Featured here are Beetroot Sabji, Instant Dhaniyala Sambar, Drumstick Coconut Milk Curry, Rice, Yogurt and Vadiyalu (Sun dried fritters). 

Typically We don't make any chutney or rasam if sambar is in the menu. Whereas in my mom's place, sambar, rasam, chutney and sabji are all part of the menu.

Recipe Source friend
Ingredients - 

Drumsticks, 2 inch pieces 1 1/2 cups
Salt, Turmeric, Garam Masala and Red Chili Powder as needed
Seasoning (Cooking Oil 1 Tbsp, Mustard seeds 1 tsp, Cumin Seeds 1 tsp, Curry leaves few)
For the Gravy - 
Onions , finely chopped 1/2 cup
Tomatoes, finely chopped 1 cup
Ginger, grated 1 tsp
Green Chilies 2-3 (or as needed)
Coconut Milk 1 cup


Method Of Preparation -


In a saucepan boil 2 cups of water and set it to rolling boil. Add the drumsticks, 1/2 a teaspoon of salt and a pinch of turmeric. 

Cover and allow the drumsticks to cook. It takes about 10 minutes.

While the drumsticks are boiling, in a different heated pan add oil, mustard seeds, cumin seeds and curry leaves.

After the mustard seeds pop, add the finely chopped onions, grated ginger and green chili paste.

Saute the onions until they are golden brown. Add in the tomatoes and allow them to become mushy.

Transfer the boiled drumsticks into the simmering onion tomato gravy. Add the water used to boil the drumsticks as well.

Sprinkle salt, turmeric, red chili powder and garam masala to taste and let the flavors blend well.


After the gravy comes together, pour in about a cup of coconut milk and allow the curry to come to a boil. Adjust the flavors if needed and remove from heat.


 Check out the Blogging Marathon page for the other Blogging Marathoners doing BM#116
You are invited to the Inlinkz link party!
Click here to enter


Preparation Time 25-30 minutes
Serves 4-5

Read More
Posted by Harini R on Monday, September 7, 2020


BM #116 Day 5 -

The next 6 days I will be posting simple everyday thalis which is a regular fare at home. These combinations will probably sound very familiar to many but for some these might serve as meal planners.

Today's meal was Methi Tomato Dal, Tindora Fry, Tomatillo-Bell Pepper Chutney, Garlic Pepper Rasam, Cucumber, Rice and Yogurt. We don't include any dessert for everyday meals unless there is a special need/craving/request :).

Garlic Pepper Rasam is a recent addition to our dining table. I have grown up without being introduced to garlic and it took quite some time for me to adapt to the flavor of garlic. 

Recently at a friend's place we tasted this garlic rasam and my family loved it. So to keep them in good humor I have started making this rasam at home..

Recipe Source friend
Ingredients - 

Ghee 1/2 tsp
Garlic minced 1 tsp
Tomato chopped 1/2 cup
Coriander leaves handful
Salt, Turmeric and Jaggery as needed
Tamarind water as needed
Pepper Powder 1 tsp
Cumin Powder 1/2 tsp
Seasoning (Ghee 1 tsp, Mustard Seeds 1/2 tsp, Cumin Seeds 1/2 tsp, Garlic sliced 2 big cloves, Red Chili 1, Curry leaves few, Asafotida 1/4 tsp)
* About 2 tablespoons of cooked Toor Dal is optional and I rarely add it.


Method Of Preparation -


In a heated saucepan, add 1/2 teaspoon of ghee and minced garlic. Saute for a few seconds until the garlic changes color.

I usually like to crush half of the tomatoes along with coriander leaves to add some body to the rasam. If using toor dal this step can be avoided.

Add the chopped tomatoes and crushed tomatoes. Allow the tomatoes to cook well. 

Sprinkle turmeric, salt, jaggery, pepper powder, and cumin powder.

Add the tamarind water and pour about 3 more cups of regular water. Adjust the flavors and let the rasam come to a rolling boil.

After the rasam boils for about 4-5 minutes, remove from heat.

To prepare the seasoning, in a small heated pan, add ghee and the rest of the seasoning ingredients. Let the garlic slices change color and get a golden hue. Remove from heat and our the seasoning into the rasam and cover with a lid.

This can be served along with rice or like my husband who likes to slurp it like a soup.


 Check out the Blogging Marathon page for the other Blogging Marathoners doing BM#116
You are invited to the Inlinkz link party!
Click here to enter


Preparation Time 20 minutes
Makes 4 cups

Read More
Posted by Harini R on Sunday, September 6, 2020


BM #116 Day 4 - 

To conclude the Platter theme for this week, I have our new family favorite, Spiced Apple Cider. Typically it is served warm, but my family loves it cold in the summer and warm in the fall :)

In the beverage bar, we have Lemon Soda, Spiced Apple Cider, Mango Lemonade, and Iced Tea.

The Lemon Soda is the typical one with carbonated water, lemon juice, salt and ice. This is an all time favorite from our growing up years.

Iced Tea is just black tea with honey, lemon and ice.
I have made the spiced apple cider a couple times now and each time the color varied owing to the type of apples used. But the flavor is addictive. 

I have made it in the Instant Pot but the process is the same on the stove top or pressure cooker too.

Here are the platters posted so far in this series  ..


Recipe Inspiration here

Ingredients - 

Apples 6-7 cored and sliced
Oranges 1-2 peeled, seeded and chopped (I added 2 peeled clementines and 2 tsp of lime juice)
Brown Sugar 3/4 cup - 1 cup (as per preference)
Ginger 1 inch, grated
Cinnamon 3 pieces (totally about 6 inches long)
Cloves 10-12
Water 5-6 cups


Method Of Preparation -


In the inner pot of the Instant pot, add the cored and sliced apples, peeled oranges, cloves, ginger, cinnamon, brown sugar and water.

Make sure it is in the vent sealing mode.

Set it to Manual or Pressure Cook 15 minutes.

Allow it to naturally release the pressure. (It took 30 minutes for the pressure to drop).

Using a potato masher, gently mash the apples in the cider.

Strain the mixture. Remove the pulp and discard the spices. This pulp can be used as spiced apple sauce. so don't throw it away.

The warm apple cider is ready for serving. The cooled cider can be refrigerated for up to a week or so. Warm the cider before serving. My little one likes the cold cider as well.


 Check out the Blogging Marathon page for the other Blogging Marathoners doing BM#116
You are invited to the Inlinkz link party!
Click here to enter
Preparation Time 1 hour
Makes approximately 3 liters

Read More
Posted by Harini R on Friday, September 4, 2020
Related Posts Plugin for WordPress, Blogger...

Search Tamalapaku


Follow me

Follow Me on Pinterest

Tamalapaku on Facebook

Subscribe via Email


Enter your email address:

Delivered by FeedBurner


On Our Menu


Archives

Followers

Member Of

All recipes are on Petitchef
Top Food Blogs
Blog Directory