Updated - As promised I did try making jaangris yet again to get a perfect shape and I think I got the shape right this time around..But I think the decision is left for the experts to decide!! Here are the new pictures...


Jaangris have always been in the 'eat out/buy' or 'get them made' categories for me all these years. Every time we see jaangris in the local Indian stores, we keep drooling and turn our eyes on to the other side to avoid getting tempted to buy them yet again! I have heard my friends rant about how easy these were to prepare and how it is misconstrued as a very complicated delicacy etc etc..

Upon the insistence of my 'significant other', I decided to try and change my opinion. I adopted the recipe from maavantalu.com and stuck to the recipe as is. And I am happy I decided to try it out. 

I found it a little difficult to get the typical jaangri shape but I managed to get some decent shape(?). My husband encouragingly said he doesn't care for the shape of the jaangris as long as they taste divine!! In some corner of my mind, I have doubts about it..Maybe I shall practice to get the shape right and probably update this post later next week. Apparently, to get the desired shape, the oil/ghee in which jaangris need to be fried, should not be very hot. Anyway for now, please enjoy the pictures I took of the delicious jaangris. I had to take the pictures in a hurry as folks here were getting restless to get a taste of those colorful jaangris!!


Ingredients - 
Urad Dal 1 cup
Sugar  2 cups
Rice 2 Tsp
Milk 2 tsp
Red color 1/2 tsp 

Oil/Ghee for deep frying

Method Of Preparation - 

Soak Urad dal and rice for about 2-3 hrs. Later Drain the water and make a fine paste adding as little water as possible.


In a ziploc cover, poke a small opening at the bottom of the cover with a hot nail and keep it ready. Alternatively a cone can be prepared with plastic/cloth.


In a separate sauce pan, add sugar and little water and boil the sugar solution to make a syrup of a single string consistency.


In a small bowl, add the red color to 2 tsp of milk and mix the color well and add it to the prepared sugar syrup.


In a wok/kadai heat oil/ghee in a medium flame and pour the urad batter into the prepared cone/zipoc cover.


Squeeze out the urad batter into the hot oil in circular pattern to get the required jaangri shape.


Fry them until they get a golden brown hue and gently slide them into the syrup.


Let them soak in the syrup for about 2-3 minutes (they should increase in size) and place them gently in a dry plate.


I am sending this to Nupur's Blog Bites - Copy Cat Edition.

Makes approx. 20 
Preparation Time 3 hrs Cooking time 45 min

Read More
Posted by Harini on Friday, April 23, 2010


I was so tempted by the Pineapple Gojju by Suma of Veggieplatter , that I had to try it and taste it first hand. My folks at home were a little apprehensive to try it out but in the end they agreed that it was indeed a delicious gojju. Though it didn't turn out in the same color (because of the difference in the variety of Tamarind and Red Chillies, I guess) as the original recipe, we all liked the flavor and thought I should share it on our blog too..I have made slight variations to suit our taste.


Ingredients -
Pineapple chunks 1 cup
Tamarind juice 2 Tbsp
Salt as per taste
Brown sugar/Jaggery 1-2 tsp
Turmeric 2 pinches
Seasoning (Oil 2 tsp, Mustard seeds 1/2 tsp, Urad dal 1 tsp, Hing a pinch, Curry leaves )

Gojju Masala - 

Coconut Powder 4 Tbsp 
Chana Dal 2 Tbsp 
Urad Dal 1 Tbsp
Coriander Seeds 2 tsp
Cumin Seeds / Jeera 1 tsp
Sesame seeds 3 tsp
Methi Seeds pinch 
Dry Red Chillies 4-5

Method Of Preparation - 
Wash the pineapple and if using canned pineapple (as I did) , drain them and wash with cold water to remove the extra sweetness.

In a saute pan, add the seasoning and after the mustard seeds splutter, add the pineapple chunks and 1 cup of water.

Add Turmeric, Cover and let the pineapple cook.

Meanwhile, dry roast all the ingredients for the masala and grind them with a little water to make a fine paste. (Don't worry even if the paste turns  out a little coarse).

After the pineapple is cooked, add the masala paste, tamarind juice, salt and brown sugar and let it simmer for about 3-4 min. Check to see if the flavors feel right for your taste. (I did that out of nervousness!!:) )
Serve it over steaming rice and papads for a hearty meal!
Serves 4 adults

Preparation Time 25 min

Read More
Posted by Harini on Thursday, April 22, 2010
9 comments
categories: , | | edit post

Raw Mangoes in Spring/early Summer are a treat for fans of mango pickles. I have nostalgic memories of eating sliced raw mangoes with salt and mirchi powder at the street hawker's stall near home..Yummy...Any way I have made some small changes to the traditional mango rice (Mamidikaya chitrannam or mamidikaya pulihora in Telugu). Raw mango is primarily rich in Vitamin C. A delightful rice to enjoy indeed!!


Ingredients -

Cooked rice 3 cups

Mango 1 medium (1 cup approx) Grated
Roasted Fenugreek powder 1 pinch
Turmeric  1/4 tsp
Green chillies 4-5 nos (vertically sliced)
Coriander leaves for garnish
Salt to taste
Seasoning (Oil 1 Tbsp, Chana Dal 2 tsp, Urad Dal 1 tsp, Mustard Seeds 1 tsp, Jeera 1/2 tsp, Dried Red Chili 1-2, Curry Leaves few, Peanuts handful)
Lemon/Lime juice 1-2 tsp (Optional or if the mango is not sour enough)


Method of Preparation - 


In a skillet on a medium-high flame, heat some oil add seasoning, peanuts and cashews. 


After the mustard seeds start crackling, add green chillies turmeric, roasted fenugreek powder and coconut powder.

Add salt and the grated mango. Mix for a couple of minutes.


Remove from the flame, add this mixture to a bowl with the cooked rice and mix well.

Squeeze the lemon juice if required.


Garnish with coriander leaves.


Serve hot.


This makes its way to Anupama's Mango Moods Event.

Serves 3 Adults
Preparation Time 25 min

Read More

Bisipinakaya (Rasa Gaya)

This has been one of the traditional recipes prepared for generations in our family and also popular mostly in the Rayalaseema region of Andhra Pradesh. Made with ripened raw mango, its slightly sweet-tangy flavour makes it a delight for our taste buds. I got raw mangoes to make a pickle from it but found it too soft for it. 

My mom reminded me of this almost forgotten age-old recipe which tempted me to make it at home for the first time. It came out very well and my husband who's not aware of this dish, enjoyed it too!

Bisipinakaya (Rasa Gaya)


Ingredients -

1 Ripened Raw Mango (Cut into bite sized pieces without peeling the skin. Discard the seed and the hard lining stuck to the mango)
1 tsp Mustard Powder
1 tsp Methi Powder
1 tsp Red Chilli Powder
Salt to taste
1 tsp Sugar or Jaggery
Urad Dal, Mustard Seeds, Dry Red Chillies, Hing (For Seasoning)
2 tsps Oil

Bisipinakaya (Rasa Gaya)

Method of Preparation -


Heat oil in a pan and add the seasoning ingredients When the seeds splutter, add the raw mangoes to it and add about a cup of water to it and let it cook.

Add Salt, Methi Powder, Mustard Powder, Chilli Powder and Sugar to it.

That's it. Bisipinakaya is ready to be served with hot rice.

Note : You could also add roasted Sesame Powder to this.


This goes to Niloufer Riyaz's Twenty-20 Cooking Event and also to Anupama's Mango Moods.


Serves 3 Adults
Preparation Time 5 mins
Cooking Time 10 mins

Read More
Posted by Jaya on Wednesday, April 21, 2010

This is one of my mother-in-law's sambar recipes which has been one of my personal favourite since she made it for us the first time. Simple to prepare, it's just a mixture of several spices without roasting any of them. The freshly ground sambar powder is what makes this recipe distinct in its taste.


Ingredients-
2 Cups Moong Dal (Washed and Pressure Cooked)
1 Medium Onion (sliced lengthwise)
1 medium tomato
3-4 Drumsticks (I use Frozen)
1/2 Cup Sorrakaya/Anapakaya
1 medium sized Carrot (Cut into circles)
1/4 Cup Cauliflower
4-5 Okras (Cut into 1 inch pieces)
2 Tbsps Tamarind paste
Salt to taste
2 tsps Sugar (Optional)
Coriander Leaves (for Garnish)
Urad Dal, Mustard Seeds, Dry red Chillies, Hing, Curry leaves (for Seasoning)
Oil

To Make the Sambar Powder-
1 tsp Chana Dal
1 tsp Dhaniya
1/2 tsp Jeera
3-4 Peppercorns
4-5 Dry Red Chillies
1 Tbsp Dry Coconut Powder

Grind all of the above without roasting them.

Method of Preparation-
Heat Oil in a pan, add the seasoning ingredients in the order listed and wait till the mustard seeds splutter and the dal turns golden brown.

Add all the veggies, a cup of water and salt and allow them to cook (I usually microwave all the vegetables except Cauliflower, Okra and Tomato).

Add the cooked Moong Dal, Sambar Powder, Tamarind Paste and Sugar and add more water till it reaches a consistency you desire. Let it boil and add coriander leaves/Cilantro just before you switch off the flame.

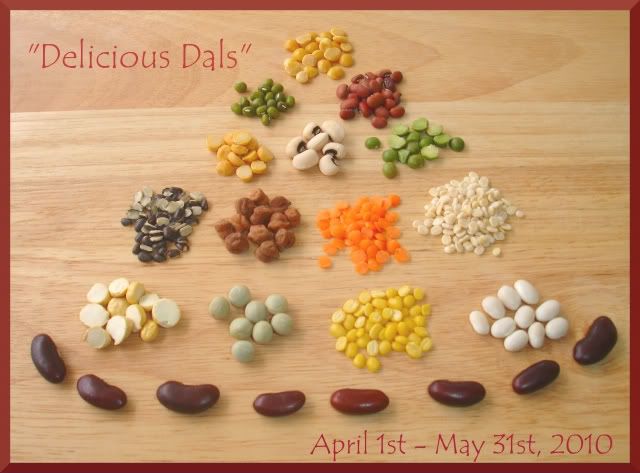
Thanks to Suma of VeggiePlatter , I am sending my mother-in-law's Sambar to her 'Delicious Dals' from India event.


Serves 4 Adults
Preparation Time 15 mins
Cooking Time 20 mins

Read More


Cabbage kootu is almost a forgotten dal variety for us at home. Back home my mom makes this kootu pretty often. Kootu typically as I understand is made with Yellow Moong dal (pesarapappu). Moong dal is supposed to easily digestible and so it is usually prepared for dinner in many households. But I chose to make it with toor dal today for lunch for a change. 

Cabbage Kootu


Ingredients - 


Toor Dal (Kandi Pappu) 1 cup
Cabbage Chopped 1 cup
Coriander Seeds (Dhania) 2 tsp
Jeera (Cumin Seeds) 1 tsp
Green Chillies 5-6 (or as needed)
Coconut powder or Fresh Coconut grated 3 tsp
Turmeric 1/8 tsp
Salt as per taste
Lemon/Lime juice/Tamarind juice as per taste
Seasoning (oil 2 tsp, urad dal 1 tsp, mustard seeds 1 tsp, dried red chilli, curry leaves)


Method Of Preparation - 


Wash and pressure cook the toor dal along with the chopped cabbage.


Make a paste of Dhania, Jeera, Coconut powder and Green chillies.


In a sauce pan , on medium - high heat, pour 2 tsp of oil and fry all the seasoning in it and add the boiled cabbage and dal.


Add the Dhania paste to the dal mixture and stir in turmeric, and salt also.


Mix well and let it come to a boil. Switch off the flame and squeeze in the lime juice.


Serve and enjoy with hot steaming rice and ghee!!

Thanks to Suma of VeggiePlatter some forgotten dals like Cabbage kootu are entering into our kitchens and also her 'Delicious Dals' from India event.


Also goes to Yasmeen's  Health nut Challenge 5- Crucial Cruciferous Veggies.


Serves 4-5 Adults
Preparation Time 35-40 min 

Read More


After getting a feel of quinoa, I mustered courage to venture into baking this nutritious grain. I googled various sites for tips on how to use quinoa in baking and came up with this formula and I was fully satisfied with the final product. Needless to say, I had to use up the strawberries fast and so they made their way into these muffins! For people who don't like too much of a nutty taste, please reduce the mixed nuts by half or so. We liked these muffins as is. I observed that the quinoa on the outer surface were crispy and soft and chewy inside. We certainly loved the texture. This is how I baked them. 


Dry Ingredients - 


Quinoa 1/2 cup
Whole Wheat Flour 1/2 cup
All Purpose Flour 1/2 cup
Mixed Nuts (Cashew,Almond and Walnut) coarsely ground 3/4 cup
Baking Powder 1 tsp
Salt a pinch
Cardamom powder 1 tsp


Wet Ingredients - 


Brown Sugar 3/4 cup
Canola Oil 1/4 cup
Strawberry Puree 1 cup


Method Of Preparation - 


Boil 1/2 cup of quinoa in 1 cup of water. It would yield a little more than 1 cup.


Sift the Whole wheat flour, All purpose flour, salt, baking powder and  cardamom powder. 


Add the ground nuts after sifting. Mix the boiled quinoa to the flour and mix well. 


Beat all the wet ingredients until well blended.


Mix the wet and dry ingredients and mix them slowly (for a min or two) to get a smooth batter. 


Preheat the oven to 350 degree F.


Gently spoon the batter into muffin cups (If using cup liners, place them in a muffin plate and spoon the batter). I used silicone (heart shaped) cups which don't need liners or a muffin plate. 


Arrange the batter filled cups on a cookie sheet (or the muffin plate as is) and place in the preheated oven. Let it bake for 25-27 min or until a toothpick comes out clean upon piercing the center of the cup cake. 


Devour upon cooling!!


This goes to the Whole grain baking event - Quinoa hosted by Madhuram of egglesscooking.com 


Also goes to CWS - Cardamom Seeds event hosted by Priya of Priya's easy and tasty recipes


Makes 12 muffins

Preparation Time 35-40 min 

Read More


Mango mousse has been on the 'to-do' list for quite sometime now. Never got the right ingredients at home and so it just got into the forgotten 'folders' of my brain. One fine day, my friend, Neelima made Mango Mousse as a surprise item for a pot-luck at our place and needless to say we were all drooling over it. So, I got the recipe from her and with full resolve, got all almost all the ingredients she mentioned and made Mango mousse to the utter delight of my dear husband!


Ingredients - 


Mango pulp 2 cups
Condensed Milk 4 Tbsp
Whipped Cream 4 oz
Instant set jelly crystals (Vegan) 4 Tbsp 
Hot Water 1/4 cup
Chopped Strawberries (or pomegranate seeds) for topping


Method Of preparation - 


In a skillet on a medium flame, heat the mango pulp until it is slightly hot (Not bubbly hot).


In a separate bowl, add 4 Tbsp of jelly crystals to 1/2 cup of boiling hot water and stir it continuously until the jelly crystals are dissolved.


Add this jelly solution to the mango pulp and give it a good stir and switch off the flame. 


Let the above mixture cool down to a room temperature. 


Add whipped cream and condensed milk to the above mixture and gently mix it. If it is mixed too much, the cream might lose its fluffiness.

If Mango Mousse is to be served in individual cups, place the chopped strawberries at the bottom of the cup, and pour adequate mango mousse in each of the cups.

Refrigerate the cups for about 30 min to 1 hr.

When ready to serve, turn the cups upside down in a bowl / plate so that the strawberries show up at the top !


Note -  
1 tsp (or 7gms pkt it comes in) of Unflavored Gelatin from Vegetable source or Pectin can be used instead of jelly crystals. 
Fresh Mango pulp can be used instead of the Tinned mango pulp.
If it is to be served at parties, gently mix the strawberries in the whole mango mousse or just use them as topping. This sure will win hearts!!


This goes to the Thanda Mela hosted by Srivalli of cooking4allseasons 

Makes 4 cups
Preparation Time 20 min , Cooling time 1 hr

Read More
Posted by Harini on Friday, April 16, 2010

After a suggestion from a friend, I reluctantly bought quinoa and was glad I found a great new way to introduce nutritious food to my picky eaters at home!!  So lots of new experiments with quinoa can be expected in the near future (My kids willing!). I have been observing quinoa making rounds in the blogging circles and was intrigued but somehow wasn't sure of the texture..In many pictures, I saw they were a little mushy and that put me off. But part of me was not happy to put away such a nutritious grain and so here I am happy to have tried it out. 
Quinoa Pulihora

Quinoa is very useful as part of a weight loss regimen. The presence of a balanced set of essential amino acids thereby makes it a unusual protein source. Also a great source of dietary fiber and is gluten-free - easily digestible too. Here is how I used Quinoa for the first time ever!!


Ingredients - 


Quinoa 1 cup
Green chillies 2-3 (as per taste)
Peanuts 3 Tbsp (Optional)
Turmeric 2-3 pinches
Dry coconut powder 1 tsp (Optional)
Roasted Methi Powder 1 pinch
Salt as per taste (1 tsp approx)
Lime/Lemon Juice 2 tsp (as per taste)


For Seasoning


Oil 2 tsp (or more as per preference)
Mustard seeds 1/2 tsp
Chana Dal 2 tsp
Urad Dal 2 tsp
Jeera 1/2 tsp
Red chillies 1 split into 2 pieces (Optional)
Hing  (Asafoetida)
Curry leaves 4-5

Method Of Preparation - 


Please check the package to see if quinoa is pre washed. If it is not then it has to be washed else it will have a bitter taste. The one I got was pre washed so I could use it straightaway. I have come across two methods of cooking quinoa 1. on stove top 2. in the rice cooker. My preferred method is always the easiest and the simplest! Yes, guessed it right, in the rice cooker, of course!!

The boiled quinoa is light and fluffy and ready to be flavorized, so to say!


For 1 cup of quinoa, add 2 cups of (clean) water and cook in the rice cooker. It should be ready in about 20 min or so. It would probably take a little longer on the stove top.


In a small skillet, add oil and the rest of the seasoning ingredients and green chillies. Also add turmeric, salt, coconut powder, roasted fenugreek powder (methi powder). 


Now is the time to add peanuts. (I didn't add them this time but I usually do) Saute them until the mustard seeds start spluttering.


In a mixing bowl, take the boiled, fluffy quinoa and add the seasoning contents and mix well. Squeeze in some lime/lemon and serve!! 

Serves 3-4 Adults

Preparation Time 25 min 

Read More
Posted by Harini on Thursday, April 15, 2010

Do you have any leftover Sambar/rasam sitting in your fridge? Are you in a hurry to make breakfast in the morning? You can make some extremely simple yet yummy breakfast for your family in a jiffy. It takes just ten minutes of your time to make this. My mom who's an expert in turning anything leftover into something delicious deserves all credit for this recipe.


Ingredients -

1 Cup leftover Sambar/Rasam
1-1/2 Cups Sooji (Bombay Rava)
1/2 Cup Vegetables (I used frozen Carrots/Beans/Corn/Peas)
1-1/2 Cups Water
Oil, Mustard seeds, Chana Dal, Urad Dal, Dry Mirchi, Curry leaves (for Seasoning)

Method of Preparation -


Grind the Sambar if you don't want the vegetables in it to appear in your Upma.

Add oil in a pan and add mustard seeds, Urad dal, Chana dal, Dry Mirchi. After the seeds splutter, add curry leaves and the frozen vegetables along with 1-1/2 cups of water and sambar and let them cook (To make it faster I microwave the veggies and add them)


Once the vegetables are cooked, slowly add the Sooji, continuously stirring so no lumps are formed. Let the rava cook for a minute or two and then switch off the stove.

Check the taste and add salt if needed. Your Sambar Upma is ready to be served.


You could optionally add some ginger and green chillies to this.

I am sending this to 'CoL - Leftover Delicacies' hosted by Daisy Blue of SpicyLounge.


Serves 2 adults
Preparation Time 4 mins
Cooking Time 6 mins

Read More
Posted by Jaya on Wednesday, April 14, 2010


Who doesn't have leftover dal or sambar in their refrigerator atleast once in a while? All of us do, don't we? So what do most of us do with leftovers? Either throw in the trash or unwillingly eat the next day or the next...no worries..now here is a snack item which my mom makes when there is leftover dal (tomato dal, mango dal, palak dal, methi dal etc ) or sambar which is sure to be eagerly devoured. Alter the dal/sambar and the flour as per what is leftover. I made with these quantities..


Ingredients - 


Leftover Dal 1 cup
Whole Wheat flour 1.5 cup
Salt as per taste
Canola/Peanut Oil for deep frying


Method Of Preparation - 


Make a paste of the dal and knead the dough with whole wheat flour and salt (add spices and/or additional water if required).


Roll out thin chapatis and cut them into 1 inch diamonds (or as any shape desired). I could make about 4 chapatis about 5 inches in diameter


Heat canola oil in a skillet on a medium - high flame and gently put these diamonds into hot oil and fry both sides.


After they are golden brown in color, transfer them onto paper towels to drain excess oil. 


Enjoy the shankarpali with tea as a snack! Store the remaining (if any) in an air tight container.


This aptly goes to 'CoL - Leftover Delicacies' hosted by Daisy Blue of SpicyLounge.


Serves 3-4

Preparation Time 40 min 

Read More
Related Posts Plugin for WordPress, Blogger...

Search Tamalapaku


Follow me

Follow Me on Pinterest

Tamalapaku on Facebook

Subscribe via Email


Enter your email address:

Delivered by FeedBurner


On Our Menu


Archives

Followers

Member Of

All recipes are on Petitchef
Top Food Blogs
Blog Directory